
Hey there, electronics enthusiasts! As a supplier of HER108 diodes, I'm stoked to share a step-by-step guide on how to mount HER108 on a PCB. Whether you're a seasoned pro or just starting out in the world of electronics, this guide will help you get the job done right.
First off, let's talk a bit about the HER108. It's a high-efficiency diode that's commonly used in a variety of electronic applications, from power supplies to circuit protection. With its low forward voltage drop and high surge current capability, the HER108 is a reliable choice for many projects. You can find more details about it on our website HER108.
What You'll Need
Before you start mounting the HER108 on your PCB, you'll need to gather a few essential tools and materials:
- HER108 Diodes: Of course, you'll need the diodes themselves. Make sure you have the right quantity for your project.
- Printed Circuit Board (PCB): This is where you'll be mounting the diodes. Ensure it's designed to accommodate the HER108.
- Soldering Iron: A good quality soldering iron with a fine tip is crucial for precise soldering.
- Solder: Use a high-quality solder with a suitable melting point.
- Flux: Flux helps improve the soldering process by removing oxidation and promoting better solder flow.
- Wire Cutters: You'll need these to trim the leads of the diodes.
- Tweezers: Tweezers are handy for handling small components like the HER108.
Step 1: Prepare Your Workspace
It's important to have a clean and organized workspace before you start soldering. Make sure your workbench is free of clutter and that you have all your tools and materials within easy reach. Also, consider using an anti-static mat to prevent electrostatic discharge (ESD) from damaging your components.
Step 2: Inspect the PCB and Diodes
Before you start mounting the HER108, take a close look at your PCB and the diodes. Check for any visible damage or defects on the PCB, such as broken traces or holes. Also, inspect the diodes to ensure they are in good condition and that the leads are straight.
Step 3: Identify the Anode and Cathode
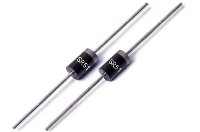
The HER108 has a polarity, which means it has an anode and a cathode. The anode is the positive terminal, and the cathode is the negative terminal. On the diode, the cathode is usually marked with a band. It's crucial to identify the anode and cathode correctly before mounting the diode on the PCB, as incorrect polarity can cause the diode to malfunction or even damage your circuit.
Step 4: Place the Diode on the PCB
Using your tweezers, carefully place the HER108 on the PCB, aligning the leads with the corresponding holes on the board. Make sure the diode is oriented correctly, with the anode and cathode in the right positions. Gently press the diode down so that the leads go through the holes.
Step 5: Solder the Leads
Now it's time to solder the leads of the HER108 to the PCB. Heat up your soldering iron and let it reach the appropriate temperature. Apply a small amount of flux to the leads and the pads on the PCB. Then, touch the tip of the soldering iron to the lead and the pad simultaneously, and feed a small amount of solder onto the joint. The solder should flow smoothly and form a shiny, concave joint. Repeat this process for the other lead.
Step 6: Trim the Leads
Once the solder has cooled and solidified, use your wire cutters to trim the excess length of the leads. Make sure to leave a small amount of lead protruding from the solder joint to ensure a secure connection.
Step 7: Inspect the Soldering
After trimming the leads, take a close look at the soldering joints. They should be smooth, shiny, and free of any cracks or cold solder joints. If you notice any issues, you may need to reheat the joint and add more solder.
Step 8: Test the Circuit
Once you've mounted all the HER108 diodes on the PCB, it's time to test the circuit. Connect the PCB to a power source and check if the diodes are functioning correctly. You can use a multimeter to measure the voltage and current across the diodes.
Tips and Tricks
- Use a Heat Sink: If you're soldering multiple diodes or working on a large PCB, consider using a heat sink to prevent overheating.
- Practice Makes Perfect: If you're new to soldering, it's a good idea to practice on a scrap PCB before working on your actual project.
- Be Patient: Soldering requires patience and precision. Take your time and make sure each joint is done correctly.
Comparing HER108 with Other Diodes
If you're considering other diodes for your project, you might want to take a look at the UF4007 and HER308. The UF4007 is another popular diode with similar characteristics to the HER108, but it has a lower reverse voltage rating. The HER308, on the other hand, has a higher current rating than the HER108, making it suitable for applications that require more power.
Wrapping Up
Mounting HER108 diodes on a PCB may seem daunting at first, but with the right tools, materials, and a bit of practice, you'll be able to do it like a pro. Remember to take your time, follow the steps carefully, and don't hesitate to ask for help if you run into any issues.
If you're interested in purchasing HER108 diodes or have any questions about our products, feel free to reach out to us. We're here to help you with all your electronic component needs.


References
- Electronic Components Handbook
- Soldering Techniques Guide